The first time I was served shrimp with their head still attached was on the Southeastern Coast of Spain. Imagine the shock I had while I awaited my grilled prawn cocktail, only to be served a glass with big shrimp eyes staring straight back at me. I was even more horrified as diners around me began to just snap the heads off their shrimp and suck the brains out. Unknown to me, shrimp brains are considered a delicacy in Spain and to be served a grilled shrimp without the head is kind of like getting served lobster without the tail, or crab without the legs. I had never seen such a thing in all my life, and quickly made a mental note not to order prawns the rest of the trip. Less than a week later, I inadvertently ate crab brains at an upscale waterfront restaurant in Barcelona. I thought it was some sort of cold crab soup served in a crab shell. I was afraid I would come across as unsophisticated if I inquired about what exactly I was eating, because I had ordered the fresh shellfish platter and didn't think it came with soup, but the menu was in Spanish, so I just ate my "soup" without any questions. I thought the "soup" was tasty, if a little salty, but overall I enjoyed it. Only afterwards, upon hearing what my "soup" actually was, did I become grossed out. It was one of those culinary moments that I'll never forget, when all of the sudden, my (small) world of food was opened up to different flavors and cooking techniques, and to possibility. The next time I was served shrimp with heads on, I didnt so much as bat an eye before snapping the head off and eating the tail. A few more times, and I was joyfully sucking the brains out, because that was the best, tastiest part. I didn't realize how good they were, that food could even be prepared in these different ways, before that dining experience.
In my opinion, travel can be the best teacher, whether it be through a trip across the globe or just to a little taqueria across town. For me, dining and food adventures have given me courage to try new things, and clarity about what I do and do not like, not only with food, but in life. I hope that there never comes a day where I am without these new culinary moments opening me up to new tastes, experiences, and adventures.

My friend Becky recommended Acadia Bistro in Northeast Portland to me about a year ago. It is a wonderful neighborhood restaurant with a lot of charm, friendly staff, and most importantly delicious Southern food with Northwest influences. My absolute favorite thing on their menu is the New Orleans Style Barbecue Shrimp. The sauce is so very good that you will be licking your fingers, but I suggest using a loaf of crusty sourdough bread to soak up every last drop!
In a craving for this dish one night, I was lucky to run across this recipe by
Acadia's Chef Adam Higgs on the
Culinate Website, so now I can make this at home, when I can't get there for dinner. I know head on shrimp isn't for everyone, so you can substitute for headless large shrimp. However, if you can source them, I recommend using shrimp with heads still on though, the heads add a lot of flavor to the dish, even if you aren't inclined to suck their brains out......Locally I buy mine at Uwajimaya in Beaverton. Recently I made these for Fat Tuesday. Having never been to New Orleans myself, I like to feel like a little bit of me has journeyed there by cooking up these shrimp!
New Orleans Style BBQ Shrimp
Serves 2 as a main course or 4 as an appetizer
1 1/2 teaspoons ground black pepper
1 1/2 cracked black pepper
1 teaspoon Creole seasoning
3 tablespoons Worcestershire sauce
1 teaspoon minced or pressed garlic (1-2 cloves)
2 tablespoons vegetable oil
1 pound large shrimp, peeled and deveined
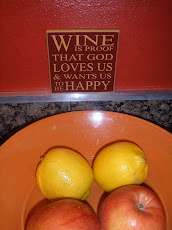
1/4 cup dry white wine such as Sauvignon Blanc
1 small lemon, cut into wedges
1/2 cup cold, unsalted butter, cut into cubes
Kosher salt
In a small bowl, combine the pepper, Creole seasoning, Worcestershire, and garlic to form a thick paste. Set aside.
Heat a large skillet (not nonstick) over medium high heat. Add the oil and shrimp, sprinkle the shrimp with salt, and then stir in the spice paste. Add the white wine and lemon wedges. Cook until the shrimp are pink and the wine is reduced, about five minutes. Lower the heat to medium and stir in the butter. Keep stirring until the butter is melted and incorporated into the sauce. Remove from the heat immediately. Do not let the sauce boil, or the sauce will break. Serve with Sourdough bread or rice! Enjoy!